PixiJS生成式球体运动与HSL色彩变换
See the Pen Unknown Pen on CodePen.
这种frosty效果类似磨砂玻璃,是一种表面粗糙不平整的半透明玻璃,其表面不平整,光线通过磨砂玻璃被反射后向四面八方散去。
❄️ frosty意为带霜的,磨砂玻璃就像是表面覆盖了一层冰霜一样。
如今这种磨砂玻璃效果十分常见,就像作者所说的👇
"There were fuzzy orbs and beautiful, glass-like interfaces floating around everywhere. Serene!"
而不断变换的generative背景实际上一个彩色球体在随心所欲地移动,正是这些随机性元素使得背景具有生成性。
Let's build !
Introduce
PixiJS - A powerful graphics library built on WebGL, we will use it to render our orbs.
KawaseBlurFilter - A PixiJS filter plugin for ultra smooth blurs.
SimplexNoise - Used to generate a stream of self-similar random numbers. More on this shortly.
hsl-to-hex - A tiny JS utility for converting HSL colors to HEX.
debounce - A JavaScript debounce function.
Install
CodePen : JS File 引入以下部分
import * as PIXI from 'https://cdn.skypack.dev/pixi.js';
import { KawaseBlurFilter } from 'https://cdn.skypack.dev/@pixi/filter-kawase-blur';
import SimplexNoise from 'https://cdn.skypack.dev/simplex-noise';
import hsl from 'https://cdn.skypack.dev/hsl-to-hex';
import debounce from 'https://cdn.skypack.dev/debounce';
Own Environment : 通过npm安装
npm i pixi.js @pixi/filter-kawase-blur simplex-noise hsl-to-hex debounce新建index.js引入以下部分(之后需要用webpack打包index.js详细过程在后面)
import * as PIXI from 'pixi.js';
import { KawaseBlurFilter } from '@pixi/filter-kawase-blur';
import SimplexNoise from 'simplex-noise';
import hsl from 'hsl-to-hex';
import debounce from 'debounce';
A blank canvas
新建index.html 并添加一个 <canvas> 元素
<!doctype html>
<html>
  <head>
    <meta charset="UTF-8">
    <title>CodePen - Generative UI - Orb Animation [pixi.js] + Frosty Elements ❄️ </title>
  </head>
  <body>
    <canvas class="orb-canvas"></canvas>
    <script src="./dist/index.js"></script>
  </body>
</html>
使用这个canvas元素创建一个Pixi实例
// Create PixiJS app
const app = new PIXI.Application({
  // render to <canvas class="orb-canvas"></canvas>
  view: document.querySelector('.orb-canvas'),
  // auto adjust size to fit the current window
  resizeTo: window,
  // transparent background, we will be creating a gradient background later using CSS
  transparent: true,
});
Some helpful utilities
random将返回一个有限范围内的随机数
map从一个范围中获取一个数字并将其映射到另一个范围,例如数字0.5在 0 - 1 的范围内,如果将其映射到 0 - 100 的范围内,则该数字变为 50
// return a random number within a range
function random(min, max) {
  return Math.random() * (max - min) + min;
}

// map a number from 1 range to another
function map(n, start1, end1, start2, end2) {
  return ((n - start1) / (end1 - start1)) * (end2 - start2) + start2;
}
Creating the Orb class
创建一个球类,它拥有x值、y值、比例scale、填充颜色fill、半径radius、一组边界bounds
现在Orb是一个二维空间中的简单圆
// Orb class
class Orb {
  // Pixi takes hex colors as hexidecimal literals (0x rather than a string with '#')
  constructor(fill = 0x000000) {
    // bounds = the area an orb is "allowed" to move within
    this.bounds = this.setBounds();

    // initialise the orb's { x, y } values to a random point within it's bounds
    this.x = random(this.bounds['x'].min, this.bounds['x'].max);
    this.y = random(this.bounds['y'].min, this.bounds['y'].max);

    // how large the orb is vs it's original radius (this will modulate over time)
    this.scale = 1;

    // what color is the orb
    this.fill = fill;

    // the original radius of the orb, set relative to window height
    this.radius = random(window.innerHeight / 6, window.innerHeight / 3);

    // starting points in "time" for the noise/self similar random values
    this.xOff = random(0, 1000);
    this.yOff = random(0, 1000);

    // how quickly the noise/self similar random values step through time
    this.inc = 0.002;

    // PIXI.Graphics is used to draw 2d primitives (in this case a circle) to the canvas
    this.graphics = new PIXI.Graphics();
    this.graphics.alpha = 0.825;

    // 250ms after the last window resize event, recalculate orb positions.
    window.addEventListener(
      'resize',
      debounce(() => {
        this.bounds = this.setBounds();
      }, 250)
    );

  }

  setBounds() {
    // how far from the { x, y } origin can each orb move
    const maxDist =
        window.innerWidth < 1000 ? window.innerWidth / 3 : window.innerWidth / 5;
    // the { x, y } origin for each orb (the bottom right of the screen)
    const originX = window.innerWidth / 1.25;
    const originY =
        window.innerWidth < 1000
        ? window.innerHeight
        : window.innerHeight / 1.375;

    // allow each orb to move x distance away from it's { x, y }origin
    return {
        x: {
        min: originX - maxDist,
        max: originX + maxDist
        },
        y: {
        min: originY - maxDist,
        max: originY + maxDist
        }
    };
  }
}
向Orb类中添加update函数和render函数,这两个函数都将在每个动画帧上运行
update函数定义球体的位置和大小是如何随时间产生变化的
render函数定义球体是如何在屏幕上显示的
update() {
  // self similar "psuedo-random" or noise values at a given point in "time"
  const xNoise = simplex.noise2D(this.xOff, this.xOff);
  const yNoise = simplex.noise2D(this.yOff, this.yOff);
  const scaleNoise = simplex.noise2D(this.xOff, this.yOff);

  // map the xNoise/yNoise values (between -1 and 1) to a point within the orb's bounds
  this.x = map(xNoise, -1, 1, this.bounds["x"].min, this.bounds["x"].max);
  this.y = map(yNoise, -1, 1, this.bounds["y"].min, this.bounds["y"].max);
  // map scaleNoise (between -1 and 1) to a scale value somewhere between half of the orb's original size, and 100% of it's original size
  this.scale = map(scaleNoise, -1, 1, 0.5, 1);

  // step through "time"
  this.xOff += this.inc;
  this.yOff += this.inc;
}
为了让这个函数运行,我们还必须定义simplex
在Orb类定义之前的任意位置添加以下代码
// Create a new simplex noise instance
const simplex = new SimplexNoise();
update函数里有很多noise ,推荐观看Daniel Shiffman 的视频Perlin Noise - The Natrue of code
简单来说random产生的随机数比较尖锐,而noise则可以产生平滑的自相似随机数
update函数基于xOff和yOff位置,使用noise2D随时间调制球类的x值、y值和比例scale的noise值
然后用map将值从-1至1映射到新范围
render() {
  // update the PIXI.Graphics position and scale values
  this.graphics.x = this.x;
  this.graphics.y = this.y;
  this.graphics.scale.set(this.scale);

  // clear anything currently drawn to graphics
  this.graphics.clear();

  // tell graphics to fill any shapes drawn after this with the orb's fill color
  this.graphics.beginFill(this.fill);
  // draw a circle at { 0, 0 } with it's size set by this.radius
  this.graphics.drawCircle(0, 0, this.radius);
  // let graphics know we won't be filling in any more shapes
  this.graphics.endFill();
}
render函数在每一帧上都会画一个新的圆
Creating some orbs!
调用app.stage.addChild将每个实例添加到我们的canvas中
这类似于调用document.appendChild()
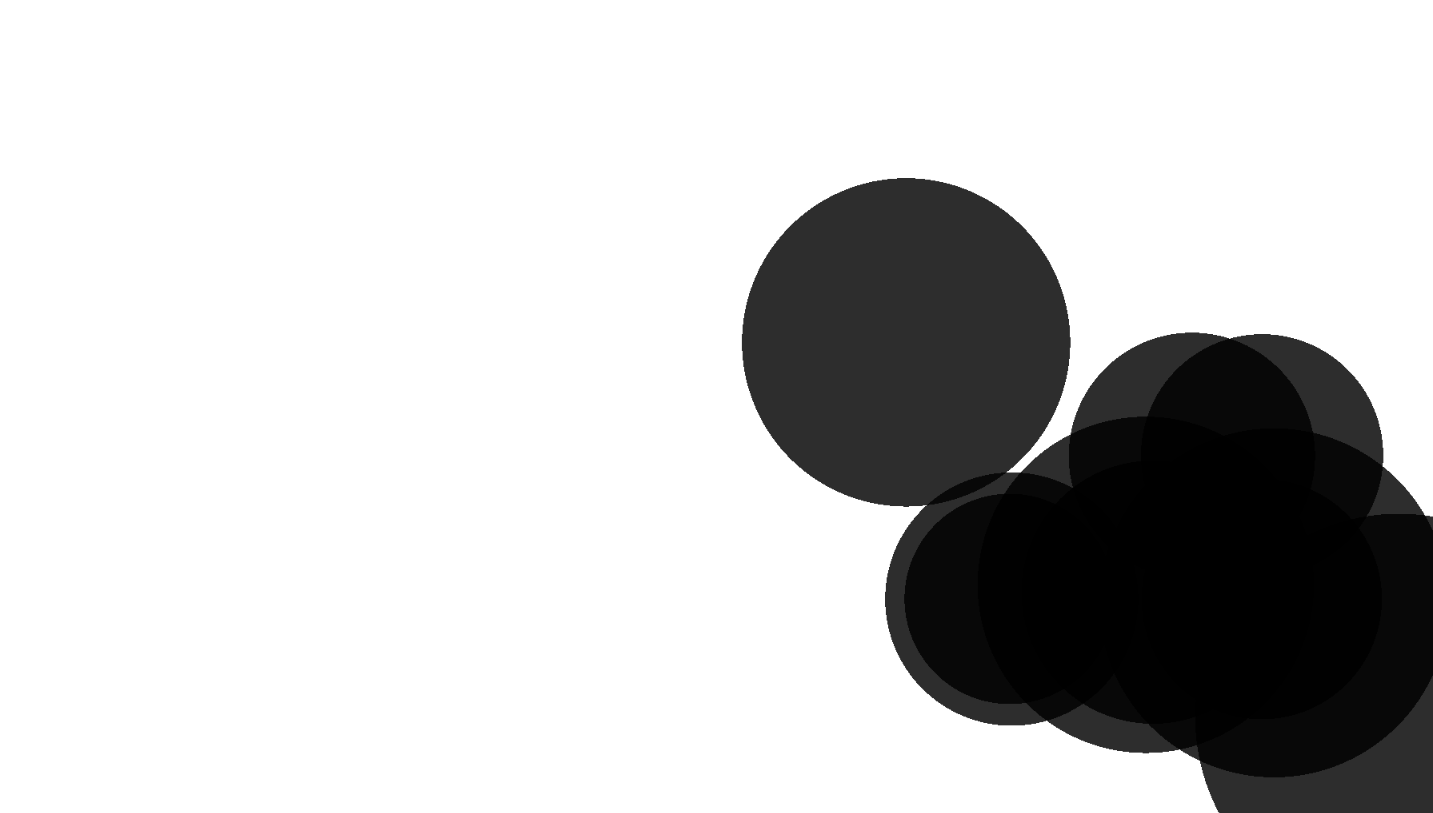
// Create orbs
const orbs = [];

for (let i = 0; i < 10; i++) {
  // each orb will be black, just for now
  const orb = new Orb(0x000000);
  app.stage.addChild(orb.graphics);

  orbs.push(orb);
}
Animation! Or, no animation?
现在我们有了 10 个新球体,我们可以开始为它们设置动画
不过并不是每个人都想要一个动人的背景,在构建此类页面时,尊重用户的偏好至关重要,如果用户设置了prefers-reduced-motion,我们将渲染一个静态背景
调用 app.ticker.add时,Pixi 以大约每秒 60 帧的速度重复该功能
// Animate!
if (!window.matchMedia('(prefers-reduced-motion: reduce)').matches) {
  app.ticker.add(() => {
    // update and render each orb, each frame. app.ticker attempts to run at 60fps
    orbs.forEach((orb) => {
      orb.update();
      orb.render();
    });
  });
} else {
  // perform one update and render per orb, do not animate
  orbs.forEach((orb) => {
    orb.update();
    orb.render();
  });
}
Webpack
安装webpack
npm install webpack webpack-cli --save-devpackage.json会出现
"devDependencies": {
  "webpack": "^5.72.0",
  "webpack-cli": "^4.9.2"
}
新建webpack.config.js
const path = require('path');

module.exports = {
  mode: 'none',
  entry: './index.js',
  output: {
    filename: 'index.js',
    path: path.resolve(__dirname, 'dist'),
  },
};
package.json中添加
"scripts": {
  "build":"webpack --config ./webpack.config.js"
}
执行一下
npm run buildindex.html中引入打包出来的index.js
<script type="module" src="./dist/index.js"></script>VSCode添加Live Server扩展,就可以在web上运行index.html
Adding the blur
现在我们给canvas加上模糊滤镜
在app定义的下方加上
app.stage.filters = [new KawaseBlurFilter(30, 10, true)];就变成了加了柔光的黑球

A Generative color palette using HSL
为了给我们的项目引入一些颜色,我们将创建一个ColorPalette类
这个类将定义一组颜色,我们可以用它来填充我们的球体,但也可以为更宽的页面设置样式
在处理颜色时HSL比十六进制更直观,并且非常适合生成工作
我们选择了 3 种主要颜色:一个随机的基色,两个补色
这两个补色是将基色分别旋转 30 度和 60 度得到的
class ColorPalette {
  constructor() {
    this.setColors();
    this.setCustomProperties();
  }

  setColors() {
    // pick a random hue somewhere between 220 and 360
    this.hue = ~~random(220, 360);
    this.complimentaryHue1 = this.hue + 30;
    this.complimentaryHue2 = this.hue + 60;
    // define a fixed saturation and lightness
    this.saturation = 95;
    this.lightness = 50;

    // define a base color
    this.baseColor = hsl(this.hue, this.saturation, this.lightness);
    // define a complimentary color, 30 degress away from the base
    this.complimentaryColor1 = hsl(
      this.complimentaryHue1,
      this.saturation,
      this.lightness
    );
    // define a second complimentary color, 60 degrees away from the base
    this.complimentaryColor2 = hsl(
      this.complimentaryHue2,
      this.saturation,
      this.lightness
    );

    // store the color choices in an array so that a random one can be picked later
    this.colorChoices = [
      this.baseColor,
      this.complimentaryColor1,
      this.complimentaryColor2,
    ];
  }

  randomColor() {
    // pick a random color
    return this.colorChoices[~~random(0, this.colorChoices.length)].replace(
      '#',
      '0x'
    );
  }

  setCustomProperties() {
    // set CSS custom properties so that the colors defined here can be used throughout the UI
    document.documentElement.style.setProperty('--hue', this.hue);
    document.documentElement.style.setProperty(
      '--hue-complimentary1',
      this.complimentaryHue1
    );
    document.documentElement.style.setProperty(
      '--hue-complimentary2',
      this.complimentaryHue2
    );
  }
}
在创建球体之前定义一个ColorPalette实例
const colorPalette = new ColorPalette();在创建球体时为每个球体随机填充
const orb = new Orb(colorPalette.randomColor());done!

Building the rest of the page
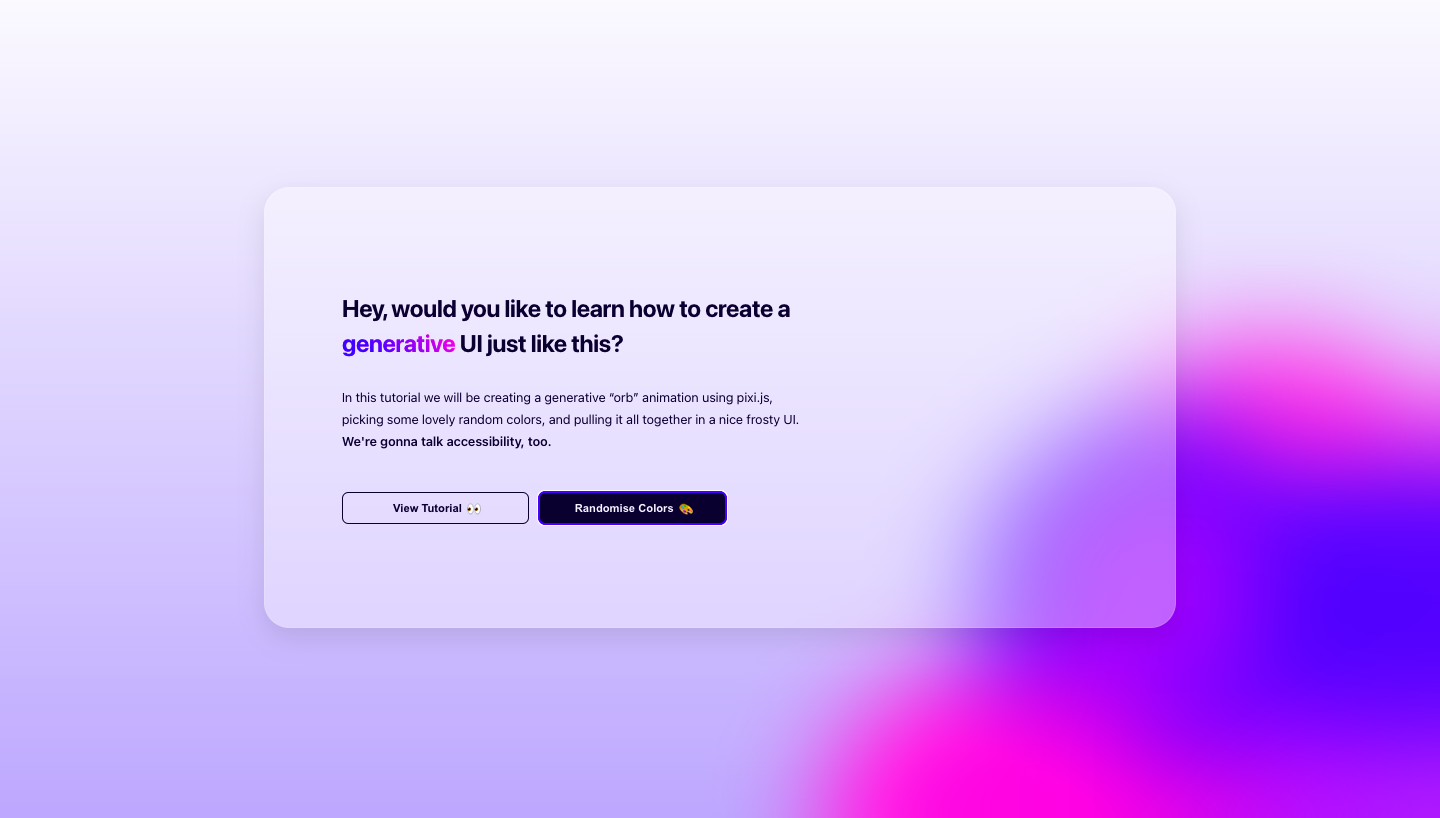
<div class="overlay">
  <div class="overlay__inner">
    <!-- Title -->
    <h1 class="overlay__title">
      Hey, would you like to learn how to create a
      <span class="text-gradient">generative</span> UI just like this?
    </h1>
    <!-- Description -->
    <p class="overlay__description">
      In this tutorial we will be creating a generative “orb” animation using
      pixi.js, picking some lovely random colors, and pulling it all together in
      a nice frosty UI.
      <strong>We're gonna talk accessibility, too.</strong>
    </p>
    <!-- Buttons -->
    <div class="overlay__btns">
      <button class="overlay__btn overlay__btn--transparent">
        <span>View Tutorial</span>
        <span class="overlay__btn-emoji">👀</span>
      </button>
      <button class="overlay__btn overlay__btn--colors">
        <span>Randomise Colors</span>
        <span class="overlay__btn-emoji">🎨</span>
      </button>
    </div>
  </div>
</div>
:root {
--dark-color: hsl(var(--hue), 100%, 9%);
--light-color: hsl(var(--hue), 95%, 98%);
--base: hsl(var(--hue), 95%, 50%);
--complimentary1: hsl(var(--hue-complimentary1), 95%, 50%);
--complimentary2: hsl(var(--hue-complimentary2), 95%, 50%);
--font-family: "Poppins", system-ui;
--bg-gradient: linear-gradient(
to bottom,
hsl(var(--hue), 95%, 99%),
hsl(var(--hue), 95%, 84%)
);
}
* {
margin: 0;
padding: 0;
box-sizing: border-box;
}
html {
-webkit-font-smoothing: antialiased;
-moz-osx-font-smoothing: grayscale;
}
body {
max-width: 1920px;
min-height: 100vh;
display: grid;
place-items: center;
padding: 2rem;
font-family: var(--font-family);
color: var(--dark-color);
background: var(--bg-gradient);
}
.orb-canvas {
position: fixed;
top: 0;
left: 0;
width: 100%;
height: 100%;
pointer-events: none;
z-index: -1;
}
strong {
font-weight: 600;
}
.overlay {
width: 100%;
max-width: 1140px;
max-height: 640px;
padding: 8rem 6rem;
display: flex;
align-items: center;
background: rgba(255, 255, 255, 0.375);
box-shadow: 0 0.75rem 2rem 0 rgba(0, 0, 0, 0.1);
border-radius: 2rem;
border: 1px solid rgba(255, 255, 255, 0.125);
}
.overlay__inner {
max-width: 36rem;
}
.overlay__title {
font-size: 1.875rem;
line-height: 2.75rem;
font-weight: 700;
letter-spacing: -0.025em;
margin-bottom: 2rem;
}
.text-gradient {
background-image: linear-gradient(
45deg,
var(--base) 25%,
var(--complimentary2)
);
-webkit-background-clip: text;
-webkit-text-fill-color: transparent;
-moz-background-clip: text;
-moz-text-fill-color: transparent;
}
.overlay__description {
font-size: 1rem;
line-height: 1.75rem;
margin-bottom: 3rem;
}
.overlay__btns {
width: 100%;
max-width: 30rem;
display: flex;
}
.overlay__btn {
width: 50%;
height: 2.5rem;
display: flex;
justify-content: center;
align-items: center;
font-size: 0.875rem;
font-weight: 600;
color: var(--light-color);
background: var(--dark-color);
border: none;
border-radius: 0.5rem;
transition: transform 150ms ease;
outline-color: hsl(var(--hue), 95%, 50%);
}
.overlay__btn:hover {
transform: scale(1.05);
cursor: pointer;
}
.overlay__btn--transparent {
background: transparent;
color: var(--dark-color);
border: 2px solid var(--dark-color);
border-width: 2px;
margin-right: 0.75rem;
}
.overlay__btn-emoji {
margin-left: 0.375rem;
}
a {
text-decoration: none;
color: var(--dark-color);
width: 100%;
height: 100%;
display: flex;
justify-content: center;
align-items: center;
}
/* Not too many browser support this yet but it's good to add! */
@media (prefers-contrast: high) {
.orb-canvas {
display: none;
}
}
@media only screen and (max-width: 1140px) {
.overlay {
padding: 8rem 4rem;
}
}
@media only screen and (max-width: 840px) {
body {
padding: 1.5rem;
}
.overlay {
padding: 4rem;
height: auto;
}
.overlay__title {
font-size: 1.25rem;
line-height: 2rem;
margin-bottom: 1.5rem;
}
.overlay__description {
font-size: 0.875rem;
line-height: 1.5rem;
margin-bottom: 2.5rem;
}
}
@media only screen and (max-width: 600px) {
.overlay {
padding: 1.5rem;
}
.overlay__btns {
flex-wrap: wrap;
}
.overlay__btn {
width: 100%;
font-size: 0.75rem;
margin-right: 0;
}
.overlay__btn:first-child {
margin-bottom: 1rem;
}
}Randomising the colors in real-time
监听按钮上的click事件,会生成一组新颜色,设置每个球体的填充色为新值
document
  .querySelector('.overlay__btn--colors')
  .addEventListener('click', () => {
    colorPalette.setColors();
    colorPalette.setCustomProperties();

    orbs.forEach((orb) => {
      orb.fill = colorPalette.randomColor();
  });
});
Take a look